I name this ship PandA II …

The local canal was the site for the launch and first voyage:

It floated – the right way up – and with two or three people in it would track in a reasonably straight line:

With one person, it slides sideways, unless you heal it hard to dig one of the chines in.  The first voyage was 2km along the canal to Sainsbury’s for ice cream and then back again.

20 months on – catch up time

Well, as with many blogs, this one has had a quiet time.  Here is the catch up showing some of the major steps up to completion – yes, PandA has been finished (well, sort of).  Unfortunately, I have lost some pictures of key steps (or maybe I never took them?).  The outside was covered with glass fibre and epoxy, then:

Making the gunwales:

Gluing them into place (and no, we don’t have enough clamps):

We made little decks fore and aft using a method inspired by Selway-Fisher.  The original instructions are somewhat vague on this.

Then, after lots of sanding, it was time for painting:

We have used standard exterior undercoat and gloss paint – we’ll see how it lasts, but it is cheaper than yacht enamel.  Polyurethane yacht varnish has been used for the decks and gunwales.

Next post: the launch!

Turning it over

This is a big moment in the building of a boat. This is when we get to see the hull form – and here it is:

dscf7323

Remember those uneven chines?  Well they didn’t go away but sanding the chines allowed me to smooth out the ripples to an extent and the canoe is becoming more boat-shaped:

dscf7329

Rounding the chines helps to smooth out the ripples

But, using cheap exterior ply has its drawbacks.  Some ripples developed in the outer ply after the unprotected sheets had been sitting in the cool and slightly damp garage for a while.  Sanding them revealed the reason why.  The inner layers had been crudely overlapped so when sanded flat, they showed through the outer veneer:

dscf7332

Not to worry though because I’m following a belt and braces approach.  Although not specified by bateau.com, I am going to sheath the boat in glassfibre.  The main reason is to learn to work with the material, but now I’ve seen the quality of the plywood, I’m glad I’m doing it.

More of that next time.

Glass fibre tape and epoxy

This was the stage I’d been dreading and Adam had been looking forward to.  Well it looked OK from a distance:

DSCF7301 (2)

But up close, you can see that we didn’t line up the tape very well and used way too much epoxy on the inside of the stems.  Here you can see how it has run down to the bottom.

DSCF7302

We used 100 mm wide tape as per the instructions, but it was difficult to get it to follow the curves of the chines.  Narrower tape would have been easier but weaker I guess.  Or we could have cut some tape with a diagonal bias from some fibreglass cloth, but that is expensive.

Tying it all together

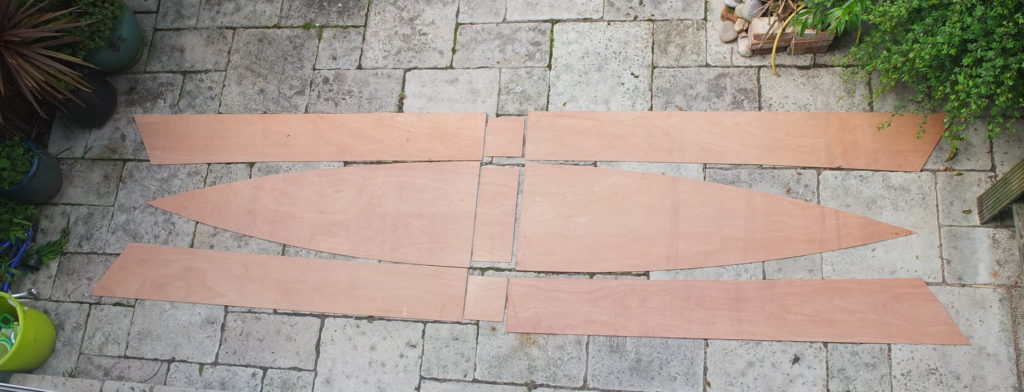
So, the garage tidied, it was time to join the sides and bottom using butt joints. Unfortunately, no pictures, so on to the next bit.

Bateau.com’s instructions suggest that using duct tape to “stitch” the panels together to hold them in place for gluing would be sufficient, but, it rapidly became clear that it wasn’t, so I added a few cable ties:

DSCF7287

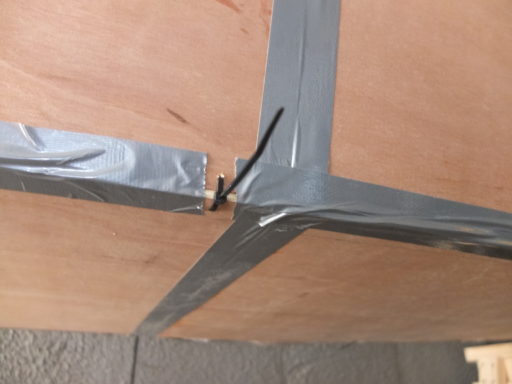
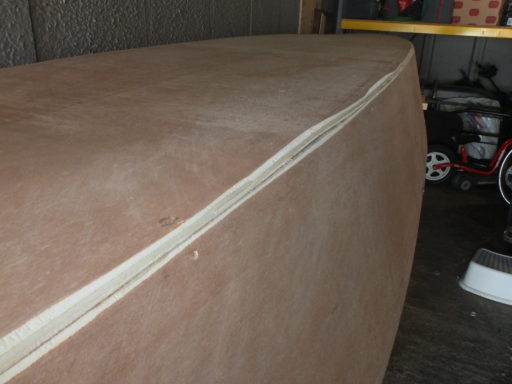
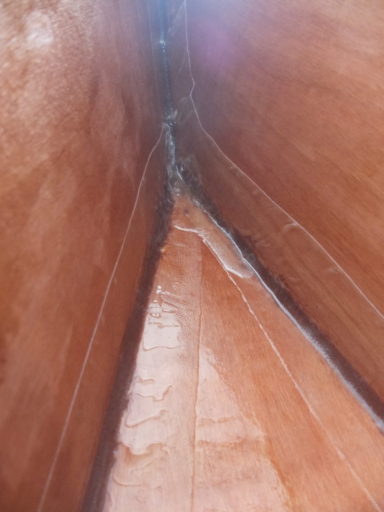
As the cable ties were an afterthought, I did not put in very many – a mistake as it happens.  Another reason for avoiding them is to reduce the number of gaps to fill in the fillet (made with epoxy and wood flour), like this:

DSCF7289

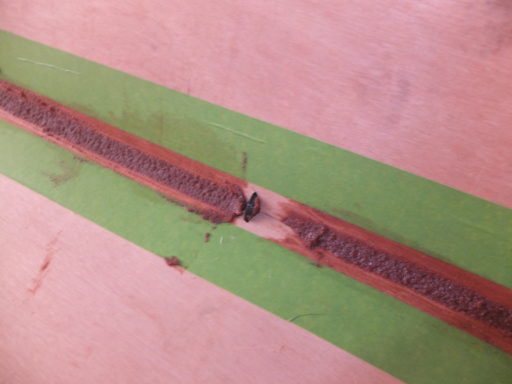
The green masking tape was meant to keep the fillets straight, but I left too large a gap; not a major problem as it happens.

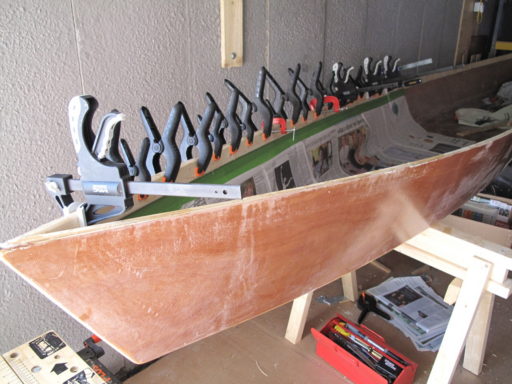
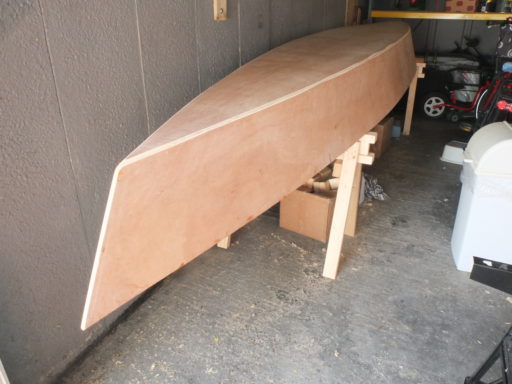
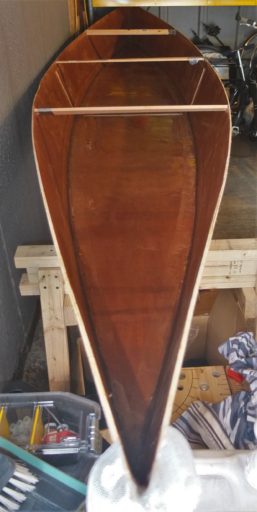
After the epoxy had cured, I removed the tape inside and out and contemplated my work on the inside:

DSCF7298

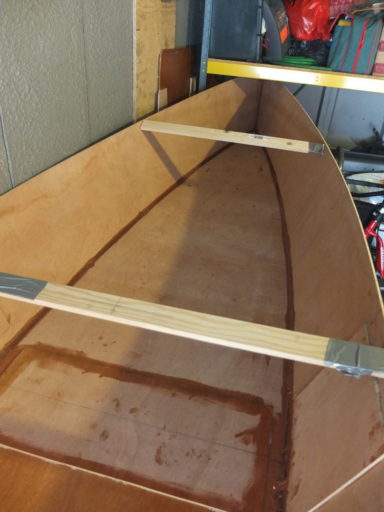
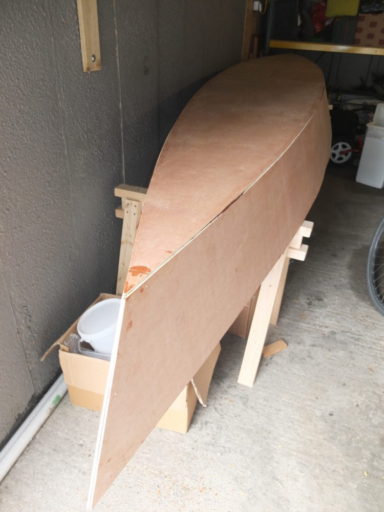
And from the outside:

DSCF7292

Oh dear, the tape covering the seam meant that I couldn’t check the alignment and the few cable ties I used pulled it out of line.  Well it’s in order to make mistakes like this that we are doing this before building the boat that we really want.

Hiatus and the Master Plan

The posts so far have taken us to the end of April.  Next, I needed covered space to build the boat and the garage was full of junk.  Many weekends passed with the labour of tidying the garage somehow taking second place to other more pressing or enjoyable activities.

So I’ll use the pause to let you in on the Master Plan.  As I said in Post 1, my son Adam wants to build a Pocketship, which theoretically will fit in the garage – just – but with no room to actually work on it, so we might have to alter that plan.  Space aside, the skills required are beyond both of us right now, so we hatched a plan to acquire the skills.  The Canoe is in fact PandA II (P-and-A II).  This is PandA:

IMG_6008

As Adam has pointed out, it’s not PandA I yet, as PandA II has not yet been launched.  PandA is an Ace Sloop made from a kit.  It was useful to be able to practice our boat building, in particular varnishing and painting, as all your brush strokes are so much more significant on a model.  I think we’ll get away with a lot more on a larger boat where our little errors will not be noticed (except by us!)

And this is PandA I sailing on the Round Pond in Kensington Gardens:

DSCF7110

If all goes well with the Cheap Canoe, PandA III will be a sailing dinghy, although if we get into canoeing in a big way, it might just be a better canoe!

Lofting the canoe

The first step was lofting – well that’s what I grandly call it. It refers to the process of transferring the 3D boat’s lines to flat pieces of wood. In fact the designer has already done that and it’s just a matter of scaling up the A4 drawings to full size sheets of plywood.

We used a bit of plastic cable trunking that I had handy to form a spline, like this:

DSCF7197

As the canoe is symmetrical fore and aft (as well as port to starboard!) both sheets of plywood will have identical cuts, so I clamped them together.  (Of course, that means I was risking ruining two pieces at once!)

Then it was out with the electric jigsaw:

DSCF7205

Bateau.com recommends using a small circular saw to get smooth curves. Mine came out a little wiggly, but I don’t think that matters as epoxy glue fills in gaps quite nicely [as it happens, greater errors later on made my wiggly cuts insignificant].

Here are the resulting pieces of wood laid out on the ground:

DSCF7280

Next step, stitching it all together – it might start to look like a canoe soon!

How it started

I have toyed with the idea of building a small sailing dinghy for a few years, in order to introduce my son to sailing and for me to learn some new skills.  Then my son said that he wanted to help, except he has loftier plans – a boat with a cabin – his ambition is to build a Pocketship.  Realising our limitations I decided to start with something simpler.

So, what are we building?  Well it’s something like a Bateau Cheap Canoe, a free plan that I’ve enlarged slightly.  In fact the designer has a slightly larger one called the Nice Canoe, but it’s a little too big for us.  I bought the ($10) plans for the larger one, just to check the scantlings would be sufficient.

Here’s the start back in April: laying out two sheets of 1.2 x 2.4 m 5.5 mm thick plywood.  It’s only cheap exterior grade, which I hope won’t matter, as we will be coating it in epoxy.  My able assistant is enjoying the spring sunshine.

Marking out the plywood

Peter